Step 2: Visitor Details
- 19 Jun 2025
- 1 Minute to read
- Contributors


- Print
- DarkLight
Step 2: Visitor Details
- Updated on 19 Jun 2025
- 1 Minute to read
- Contributors
- Print
- DarkLight
Article summary
Did you find this summary helpful?
Thank you for your feedback!
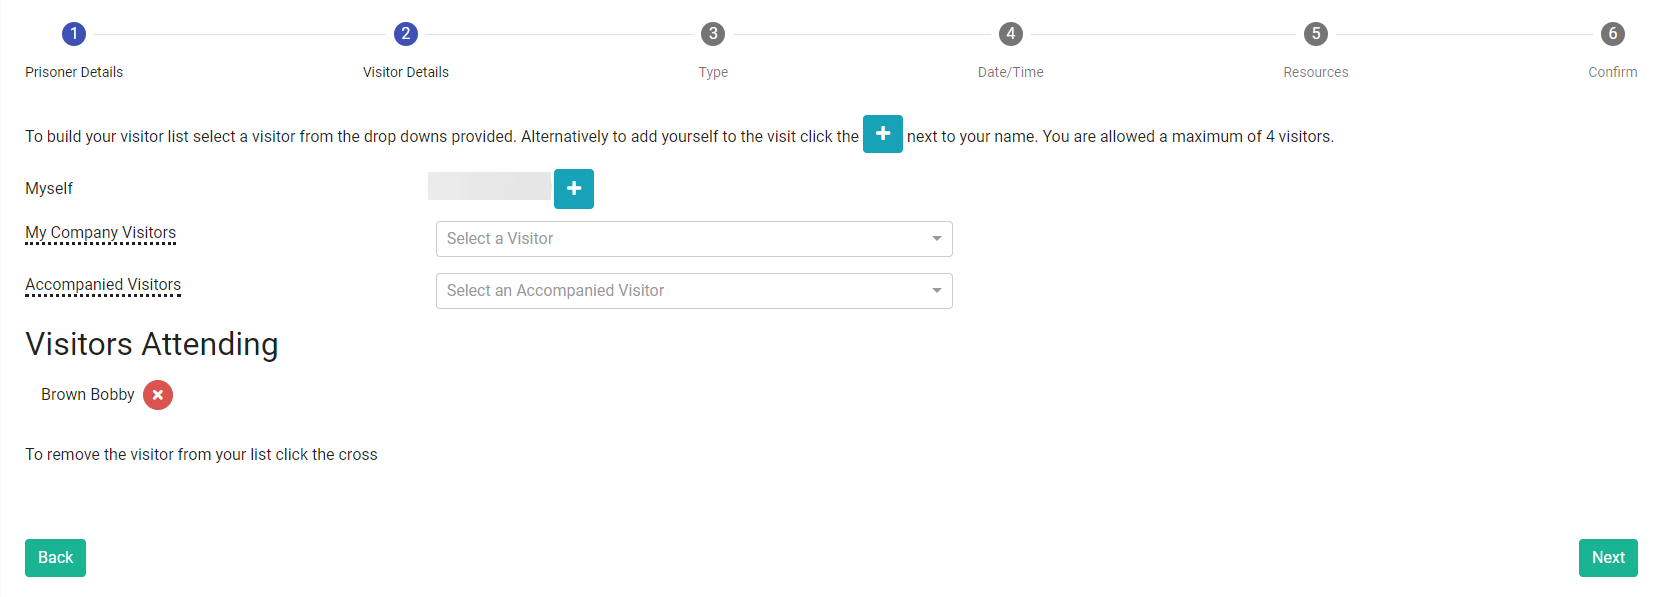
Once you have completed Step 1: Prisoner Details, you are now required to build your visitor list. The count indicates the maximum number of visitors you are allowed.
- Select the + button to add yourself to the visit.
- Select options from the My Company Visitors drop-down.
- Select options from the Accompanied Visitors drop-down.
There is also a type to search option on these fields. - Start to type the email address of the individual. Any corresponding matches are displayed in a drop-down list, from which you can make a selection.
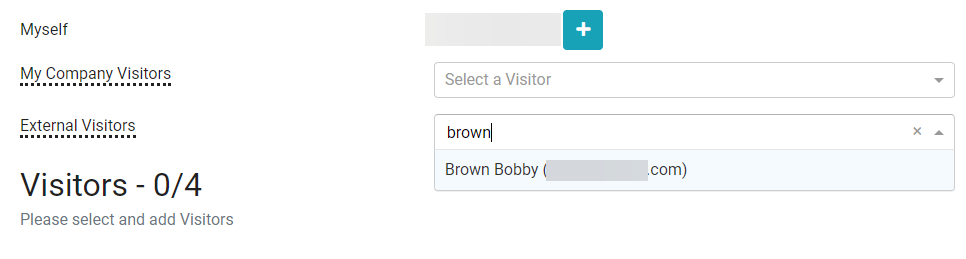
The visitors are listed according to first name, last name, email address - enabling you to identify which company an individual is associated with, and also to easily distinguish between visitors who have the same name.
Once a visitor is added to the Visitors Attending list, their details will be disabled in the drop-down menu. If you subsequently remove a visitor from the Visitors Attending list (see below), their details will be enabled in the drop-down menu.
If there are no options to choose from, the drop-down list will be disabled.
For information on adding Company or Accompanied Visitors, see the My Company Visitors or Accompanied Visitors articles.Note:You cannot add unaccompanied visitors once the visit has been confirmed. You will need to cancel and rebook, so take care to ensure you make a selection where necessary. - Select the X symbol to the right of a visitor's name to remove them from the Visitors Attending list, if you entered the visitor in error or they cannot attend.
If a visitor is on a temporary ban, a notice is displayed next to their name and the date of the expiration of the ban is displayed. You can proceed with the booking - only dates after the expiration of their ban will be available for selection.
If a visitor is banned permanently, they will not appear in the drop-down list. - Select Next when you are ready to proceed to Step 3: Type.
Was this article helpful?